
This post may contain affiliate links, which means I get a small percentage of the sale at no extra cost to you. I only recommend items I love and have had a positive experience with. Thank you!
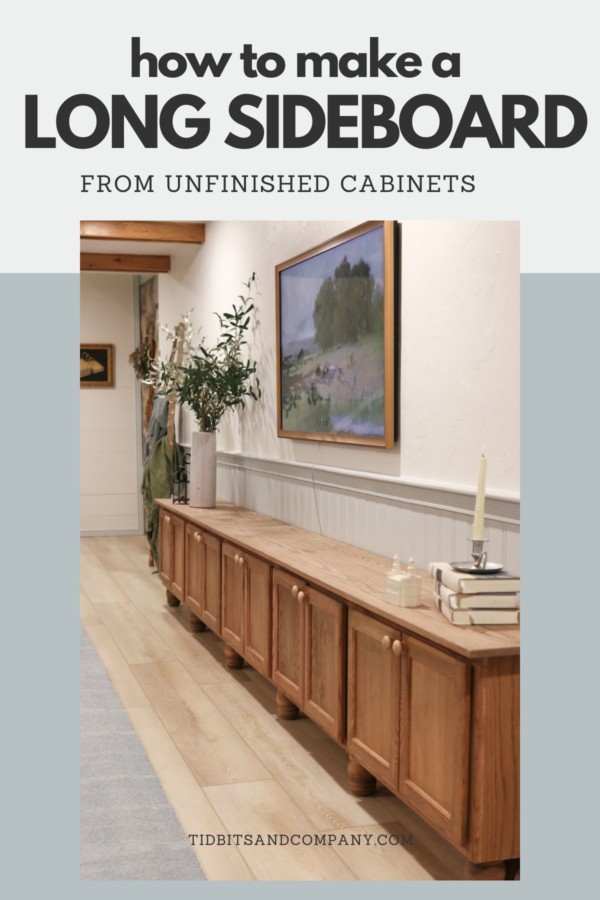
Whether you have an extra long space or want to make a custom long sideboard or console table, this tutorial is for you! Unfinished and inexpensive cabinets can be brought together and customized for a one-of-a-kind sideboard or TV console.

Welcome, friend! I want to show you a lovely piece of custom furniture that Mr. TIDBITS made for the Lavender Blue Cottage basement.
A little background: Our basement living room is a very long and narrow space. The vision I had for this room involved a long sideboard cabinet that would sit below our frame tv opposite of the couch. I wanted this sideboard TV console to be proportionate to the dimensions of our room, which ended up posing a huge challenge.
Nothing we looked at in person or online seemed to work. Even the longest ones I could find were still not quite proportionately correct, and they were all ridiculously expensive.
We decided that the best solution would be to build one, of course! Taking the DIY route saved us hundreds of dollars and required minimal effort. We loved customizing the look and dimensions of our extra long sideboard to fit our space perfectly. The extra storage and cheaper cost are the cherries on top!
Join me and I’ll show you what we did so that you can make one for yourself.
Table of contents

What is a Sideboard Cabinet?
If you’re wondering what a sideboard is, you’re probably not alone. A sideboard is a wide, low piece of furniture that includes storage. Some people might refer to them as a buffet cabinet, and sideboard buffet, or a credenza.
Sideboard/buffet tables are often seen as dining room furniture that you can use to store plates and dinner ware. It’s a bit different from a console table which tends to be taller, narrower and used mainly for decorative purposes.
Whatever you choose to call these babies, they are super useful and make great additions to any living space. The width and storage capacity are so practical, while the style and finishing touches make a great platform for a TV, decor or accessories.
How to Make a Long Sideboard Cabinet
Choose Your Cabinets
You can purchase any size of unfinished cabinet that fits your space and desired outcome. We wanted to keep a very low profile for this basement with a low ceiling, so we purchased the 30″ wide and 18″ high oak cabinets from Lowes. They seemed very low, but we knew we were going to put feet on them to raise them up to the perfect height.

Add Spacers if Needed
On our cabinets, the fronts stuck out further than the sides. To give the doors clearance to open and shut freely, we had to place a filler block in-between the two cabinets and then screw them together.

The filler block was 1/2 inch in thickness, and we just used plywood.
Attach Your Cabinets
Next, we attached all of our cabinets together to form one long unit. For reinforcement, we screwed them together on both the top and the bottom.


Here you can see all the cabinet sections attached together, ready to move onto the next step.

Finish the Sideboard Cabinet Ends
Our cabinets came with unfinished sides. To remedy this, we overlaid the unfinished sides with 1/4-inch-thick oak boards, found at Home Depot, and stained them the same color as the cabinet fronts. Next, we attached the oak boards using finish nails so that you couldn’t see them, since we didn’t want to putty them over.

Add Pulls or Knobs
We used a Kreg Jig to line up the hole for the knobs, and drilled the hole with an 1/8 inch drill bit. Then we attached the wooden knobs and kept them unfinished because we liked the look of the two tones.

Attach Feet
Next came the feet. To attach the wood bun feet, we used a 3/4-inch filler block to level and give more reinforcement for the feet. We drilled a 3/8-inch hole and inserted a steel pronged tee nut and threaded the foot onto the filler board.

Install a Sideboard Cabinet Top
At this point, we flipped our sideboard cabinet right side up and attached oak boards for a solid wood top. Because this piece is so long, we did have to have a seam.
We attached the countertop to the cabinets by screwing from the inside of the cabinets and up into the cabinet top. We then stained them with the same stain.

What Stain Did We Use?
We played around with mixing some stains and applying them to oak boards to figure out what exact color we wanted in this room.

We ended up being happy with a 3:1 ration of Early American:White Pickling stain. This was applied with a rag. Don’t forget your glove! 😉

And finally, our long sideboard cabinet was done! Not pictured is us kicking back on the couch and admiring our handy work, but you better believe that happened. DIY furniture pieces always end up being my favorites!
More DIY Tutorials and Inspiration
We love how this sideboard cabinet came out and how much more affordable it was than buying one. If you’ve got something similar on your wishlist, give this tutorial a try. It’s a great way to customize the look, color and dimensions of a sideboard to your tastes. It’s the perfect piece with plenty of cabinet storage!

If you’re hankering for some more DIY inspiration, try:
- DIY Interior Stone Accent Wall
- DIY Fireplace Mantel Surround | Faux Cast Stone European Style
- Slim Entry Table Building Plans
- DIY Large Framed Chalkboard – IN ANY COLOR!
- DIY Shop Worktable
- DIY Rolling Work Table / Kitchen Island
- Antique Inspired DIY Baker’s Rack Building Plans
- DIY Wooden Egg Holders
- How to Make a Charming Outdoor Clothesline
- How to Choose a Deco TV Frame for Your Samsung Frame TV








What did you use for the countertop?