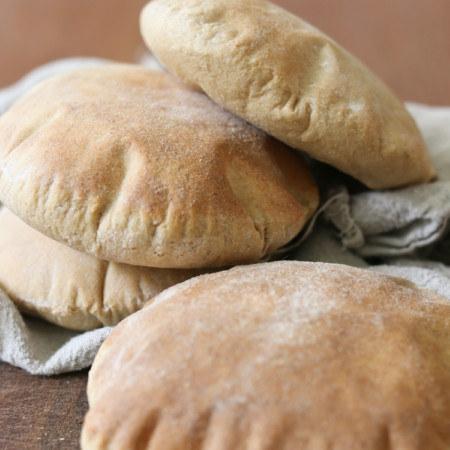
Homemade Pita Pockets with Fresh Milled Flour
Servings 8 pita pockets
Ingredients
For the Dough
- 1 cup lukewarm water
- ½ tablespoon active dry yeast
- 1 teaspoon honey
- ¼ cup olive oil
- 1 teaspoon salt
- 2 cups (280 grams) of freshly milled whole wheat flour
Instructions
Activate Yeast
- Pour the warm water into a large bowl and add the yeast and honey to the water. Mix slightly and let sit for 5-10 minutes to activate the yeast.
Mixing the Dough
- Add to your bowl the oil, salt, and flour. Mix these ingredients together until well incorporated.
- Knead the dough for at least 5 minutes.
First Rise
- Oil your bowl, roll your dough ball into the oil, and cover with plastic wrap or a moist tea towel.
- Let the dough rise until doubled.
Shaping the Pita Bread
- Punch the dough down to release all the air and knead it a couple of times. Divide the dough out into 8 equal portions.
- Flour your surface, and form each portion into a ball. Cover the dough balls with a moist tea towel (we don’t want them to dry out) and let rest for 15 minutes.
- After resting, roll them out into a flat circle shape, ¼ inch in thickness. Dust the tops with a little bit of flour.
Baking Instructions
- If possible, bake the pitas on a pizza stone or cast-iron skillet - or something that will get very hot and hold onto that heat.
- When ready to bake, preheat your oven and the stone/skillet at the same time to 475-500 degrees fahrenheit. You’ll want the oven and the pan to be very hot. This is key to getting them to puff up.
- Once preheated, carefully remove the pan and place the rolled out dough on top of the pan, and quickly put it back in the hot oven. You may not have room for all of them to cook at once, but you can do it in sessions. Watch the oven closely to see when they are fully puffed up and beginning to brown on top. This takes about 5-6 minutes. You can even set the oven to broil for a minute to get the tops crispier. If you do this, watch it very closely!
- Once all the pita pockets are done, remove them from the oven and place on a cooling rack.
- You can eat them hot or let them cool before slicing them in half and filling them with your desired fillings.