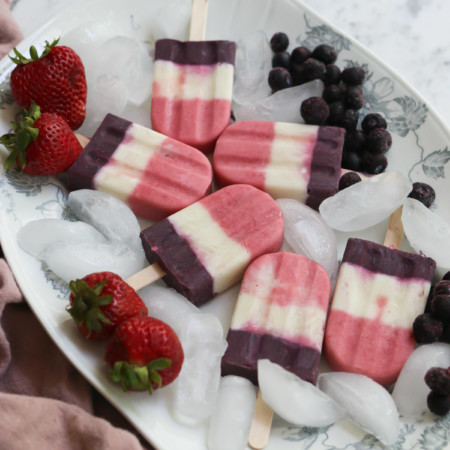
Layered Homemade Yogurt Popsicles
Servings 12 Popsicles
Healthy, creamy and delicious! Layered homemade yogurt popsicles are the perfect summer treat!
Equipment
- Blender
- Popsicle mold
- Popsicle sticks
Ingredients
Ingredients for Base Yogurt Recipe
- 2 cups plain yogurt
- 1/2 cup coconut milk
- 1/3 cup pure maple syrup (or other natural liquid sweetener)
- 2 teaspoons pure vanilla extract
- 1 cup frozen or fresh fruit per layer (strawberries, blueberries, mango, pineapple, bananas, raspberries, peach, etc.)
Instructions
- In a blender or bowl mix together the yogurt, coconut milk, syrup and vanilla.
- Set this mixture aside in a separate jar, bowl or container.
- To make your first layer, take 1 cup of the yogurt mixture you just mixed up and put inside a blender. Add 1 cup of your fruit of choice and blend up until very smooth. You can also add food coloring or other options to create a more potent color - but I find it best to leave it out and enjoy the natural color of the fruit. You could add spirulina powder or beet root powder for a healthier choice to make a richer color.
- Fill your popsicle molds up about 1/3 of the way with this mixture, insert popsicle sticks and set in freezer for at least 1 hour.
- If you want the second layer to be white, simply remove about 1 1/2 cups of the yogurt mixture and fill the molds another 1/3 of the way up. You could also add more fruit to this layer, blend and pour.
- Let freeze again for another hour or more.
- For your last layer, blend fruit in with the remaining yogurt mixture and finish filling the popsicle molds. Freeze until completely solid.
Notes
- You can use greek or plain yogurt, but you want a pretty runny consistency in the end. You could add more milk or coconut milk in greek yogurt to make it the right pourable consistency.